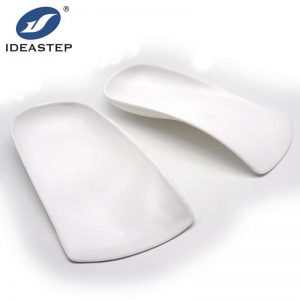
To use heat moldable orthotic insoles, follow these general steps:
1. Read the instructions
Each brand or type of heat moldable orthotic insole may have specific instructions for molding and usage. It is important to carefully read and understand the provided instructions before proceeding.
2. Prepare the materials
You will typically need a heat source (such as hot water or a heating system specifically designed for this purpose), a bowl or container large enough to fully submerge the insoles, and any additional items mentioned in the instructions (if applicable).
3. Heat the insoles
Follow the recommended method of heating provided by the manufacturer. This usually involves either immersing the insoles completely into hot water for a specified period or using a specialized heating system designed for shaping orthotic inserts.
4. Mold while warm
Once heated, remove the insoles from their heat source using tongs or other appropriate tools (to avoid burning yourself). The softened material should be pliable but not scorching hot. Place them inside your shoes immediately while they are still warm.
5. Position correctly
Ensure that each footbed is positioned properly within your shoe, aligning it with your arches and ensuring full coverage along the length of your feet.
6. Stand/walk on them
While wearing your shoes with molded orthotic inserts, stand up straight and walk around to allow them to conform further to your feet’s shape under body weight pressure.
7. Adjust if needed
If you feel any discomfort or if certain areas require more support or cushioning after walking around briefly, consider adjusting individualized fit by applying gentle pressure on specific spots using fingers until desired comfort is achieved.
8. Allow cooling time
Let both shoes cool down naturally with inserted custom-shaped insoles inside without removing them prematurely – this allows adequate time for stabilization and solidification of molded shape.
9. Test for comfort and effectiveness
After sufficient cooling time, check for overall comfort and support provided by the molded insoles. Make sure they feel secure and properly aligned with your feet’s contours.
10. Repeat if necessary
If you are not satisfied with the initial molding results or feel any discomfort after wearing them for a while, some heat moldable insoles can be reheated and remolded following the manufacturer’s instructions.
Remember that these steps provide general guidance but it is important to refer to specific instructions provided by the manufacturer of your particular orthotic insoles as different brands or models may have their own unique requirements and recommendations.
Related product links: https://www.aideastep.com/product/heat-moldable-pp-shell-insoles-pre-fabricated-orthotic-insoles-with-deep-heel-cup/.
